I consider myself a little bit of an expert in Pinterest mistakes because I think I have made them all. The good news is that you can learn from my mistakes, fix them, and start going viral on Pinterest.
Getting good traffic from Pinterest was a mystery to me for a long time. I kept doing the same thing over and over again and expecting different results. Shocker – I didn’t get them. I kept pinning and kept getting about 20 – 40 clicks a day from Pinterest. I thought maybe it just took time, but it had been almost a year.
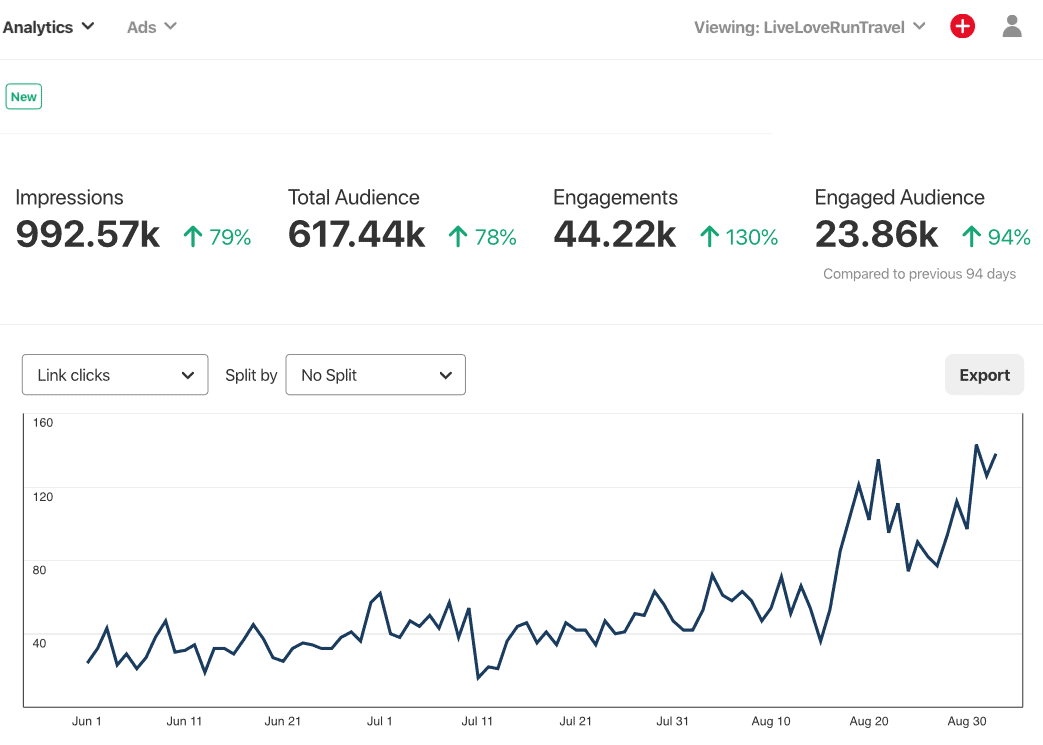
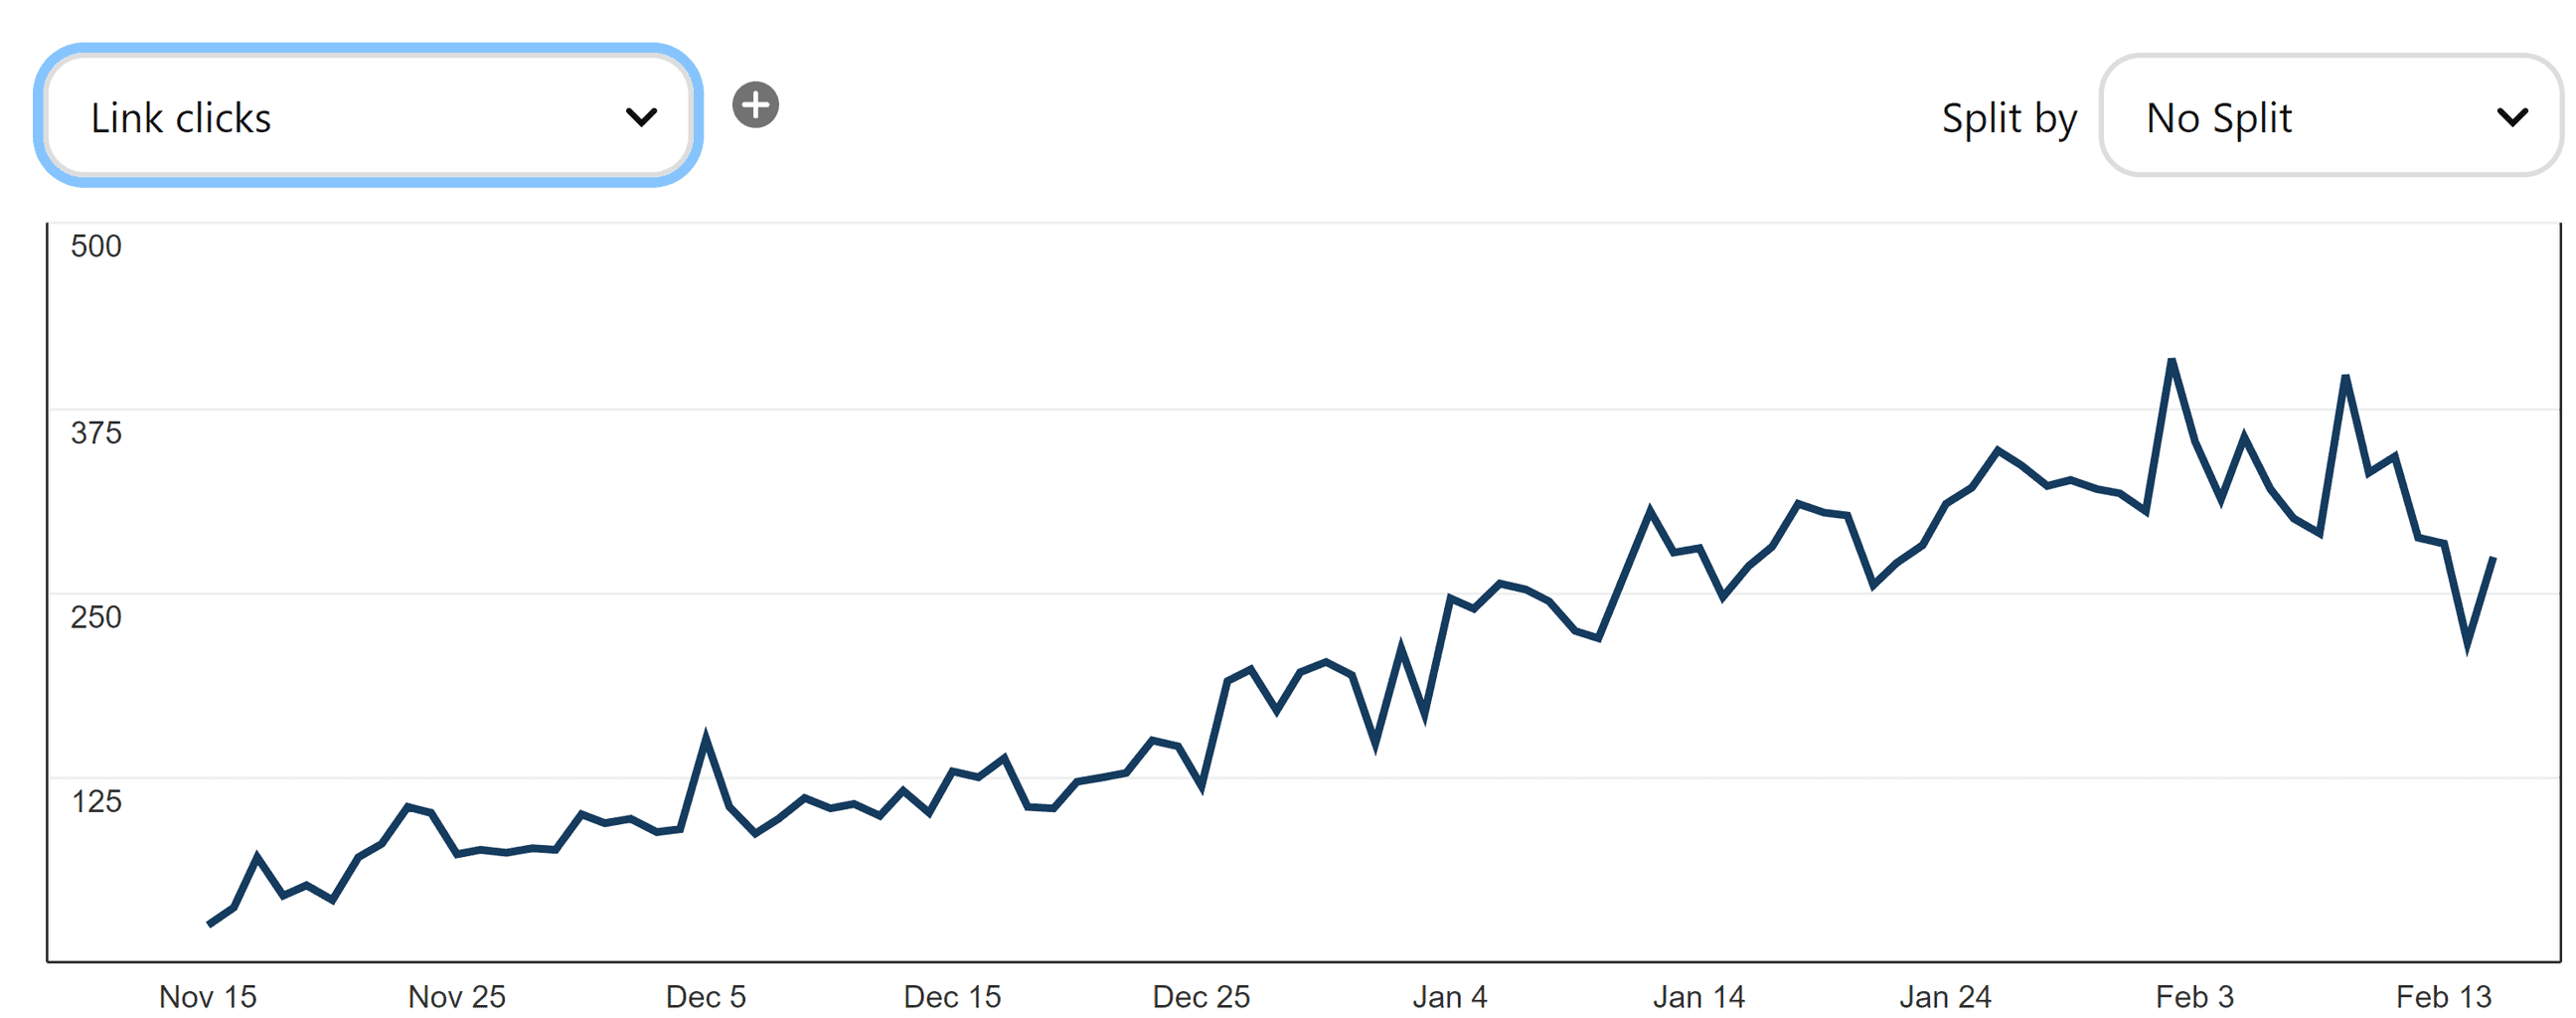
After starting to use these Pinterest tips, I over doubled my clicks in one month and over tripled them in the next month. Within four months, I went from 40 clicks a day to over 400 clicks a day.
My monthly views went from 100,000 to almost 350,000 in about six weeks. I hit 900,000 monthly views just two months after that. While monthly views aren’t important, my pins being seen more often helped me get more saves and more clicks. My most important metric is the number of clicks though as my goal is to grow my blog traffic.
If you are struggling to increase your Pinterest traffic, check and see if you are making any of these Pinterest mistakes that keep your pins from going viral. If so, make some changes and watch your Pinterest traffic grow.
Looking for some help with Pinterest? I offer Pinterest management services, pin creation, and strategy sessions/coaching calls through my agency, Pinnovation Media. Find out more about our services here. We also share free tips on our Instagram page here and on Clubhouse (find me at @pinnovation).
***Some of the links in this posts are affiliate links. If you purchase from them, I earn a small commission at no extra charge to you.
Sign up above for my FREE 5 day Pinterest audit email series from Pinnovation Media, my Pinterest Marketing agency, to make sure your account is optimized for Pinterest.
WHAT IS A VIRAL PIN ON PINTEREST?
Viral pins on Pinterest are your highest performing pins. There is no set number of saves or clicks that determines if a pin is viral or not. For some people, a viral pin brings in 20 – 30 clicks a day. For others, a viral pin brings in thousands of clicks a day. It all depends on how your pins typically perform.
Some viral pins only last a day or two. Others last a week or even longer. Some pins go viral right away. Others go viral months later when you least expect it.
I have one pin that is just an image. When I first pinned it, no one cared. Suddenly that blog post started getting regular clicks from Pinterest. When I looked into it, it was a pin I shared about 8 months prior.
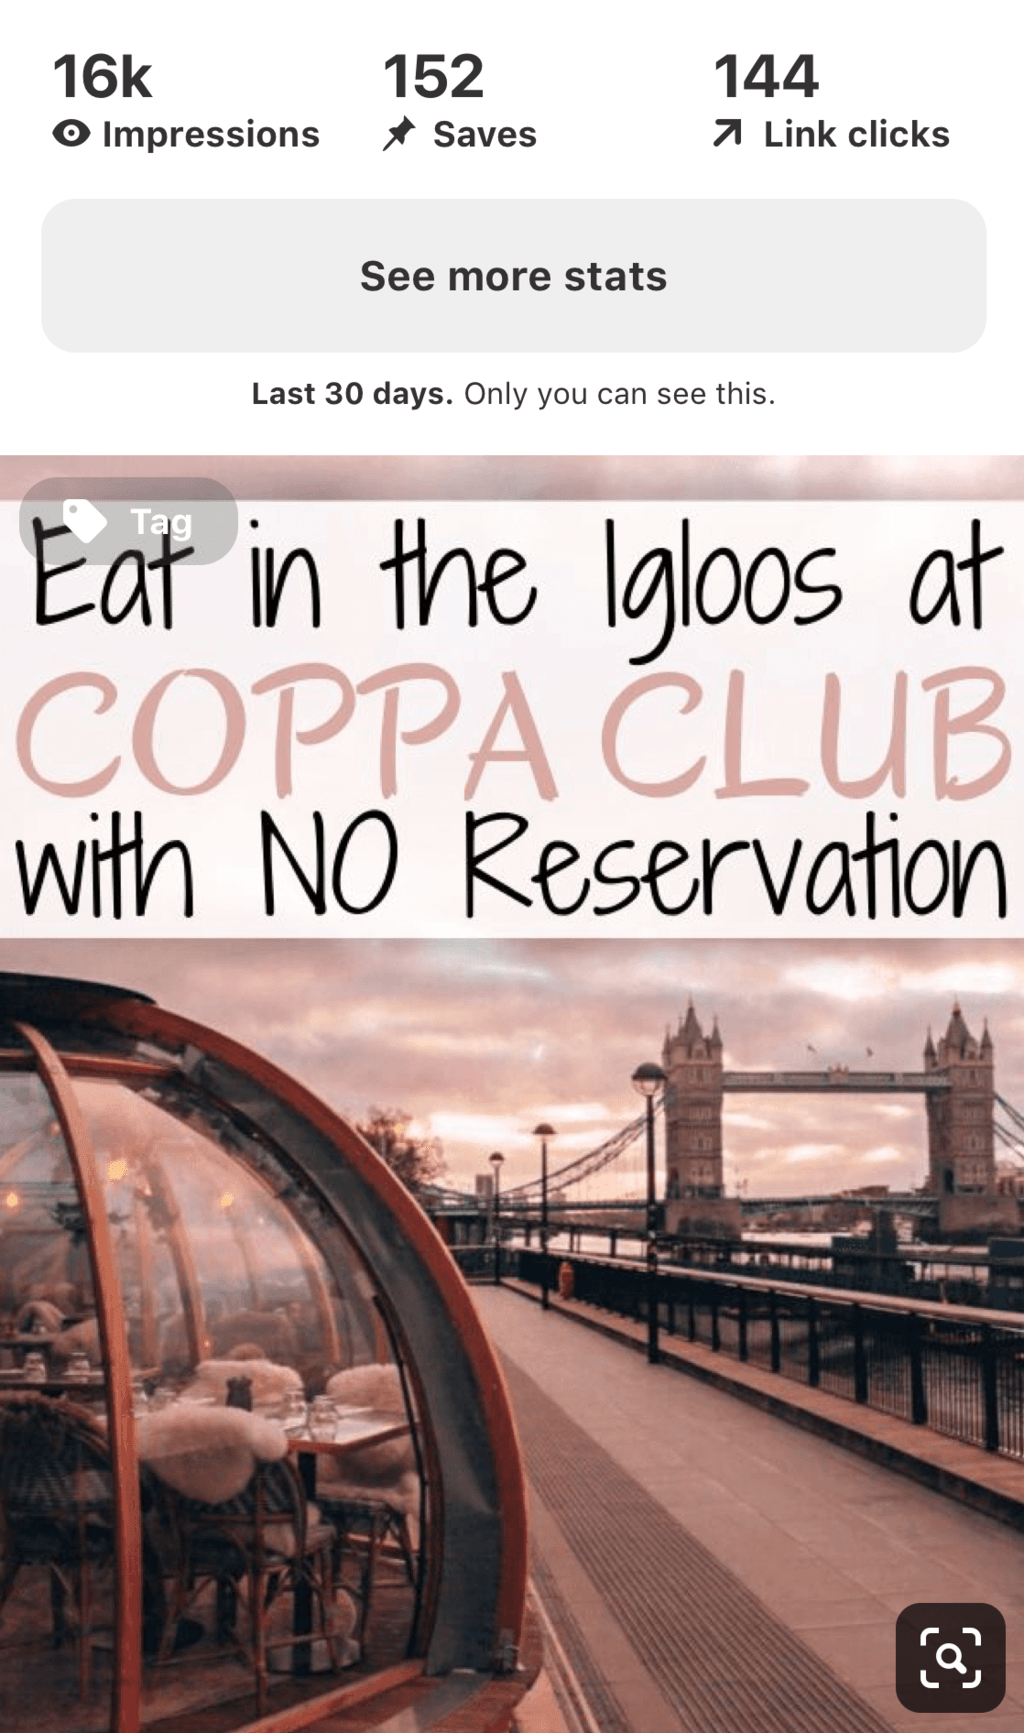
Another pin I shared got noticed immediately. In 24 hours, it had over 150 saves and about the same number of clicks. It continued and within a week was my most saved, most viewed, and most clicked pin. Then it slowed down. It still gets some saves and clicks, but not nearly as many as it did at first.
I’ve now had travel clients have pins go viral and get over a million views in just a week and over 25,000 clicks in the first 30 days on just that one pin. In other niches I’ve seen even more with clients including single pins getting six figures of clicks in 30 days.
While viral pins are great, your hope is that they become cornerstone pins. Cornerstone pins last much longer. They may not have the flashy numbers that a viral pin gets, but they continue to do work every day without fail. Many people advise you to keep pinning until you have at least 20 cornerstone pins that bring in clicks every day.
WHY SHOULD BLOGGERS USE PINTEREST?
A common goal for most bloggers is to build their blog traffic. When I first started blogging, I did not know much. Over the last two years, I have learned quite a bit about blogging. One of those things is how important Pinterest is for bloggers.
I never used Pinterest personally. I did not understand the craze and avoided clicking on search results from Pinterest. When I started blogging, I still avoided Pinterest for about a year. I did not see the importance of Pinterest for getting traffic. I wrote good posts (or so I thought), so why wouldn’t people find them on their own and read them?
It turns out that Pinterest is much more important than I originally thought. It is now my highest source of traffic to my blog without having to spend hours on it. With just a few minutes a day, I can get hundreds of clicks to my blog.
With SEO (search engine optimization), it often takes 3 – 6 months to start seeing results. Some blogs make it to the top search results in just a few weeks, but others never make it at all or take a year to get there. If you struggle with patience like me, you don’t want to wait months for that post you worked so hard on to get any traffic.
That’s where Pinterest comes in. While you wait for Google to figure out your post and start ranking it, Pinterest can send you traffic. There is more instant gratification in Pinterest because you get the results much faster. Sure, some pins take months to get traffic, but many pins start getting at least a click or two within a few days.
ISN’T PINTEREST JUST ANOTHER SOCIAL MEDIA PLATFORM?
No! Pinterest, while often grouped with social media, is actually a search engine. People use Pinterest to search for ideas or plan trips. When they search, your pin can show up in the search results. If your pin is one of the top ranking pins for a popular search, you are likely to get quite a few saves and clicks.
With social media, your posts disappear quickly. On Twitter, your tweet is gone within minutes. On Facebook and Instagram, your posts may show up for a few days but get most of their traffic in the first 24 hours. With Pinterest, your pins can bring in traffic much more long term.
Plus, Pinterest doesn’t take as much time as other social platforms to grow. I focused on growing my Instagram instead of my blog for a long time. I wanted to grow my Instagram authentically with the ultimate goal of driving more traffic to my blog.
In the past, I spent hours a day on Instagram. While I grew, it did not send me as much traffic as I hoped. I still use and love Instagram, but Pinterest is the better route to go for growing your blog.
COMMON PINTEREST MISTAKES & HOW TO FIX THEM
If you are making some or all of these mistakes, know you are in good company. I have been there and made these mistakes. However, there is hope for you – I am proof of that. Some of these changes can be made in a few minutes, and others take a little longer to implement. If you want to save this post for later to gradually make the changes, here is a pin for you to save:
#1: NOT OPTIMIZING YOUR PINTEREST PROFILE
Your profile is the first thing people see on your page. It also signals to Pinterest who you are and what your page is about. Try to put “Travel Blog” or “Travel Blogger” (or whatever your niche is) in your title. When people search for travel bloggers, your page is more likely to show up that way.
You also want to fill in your biography. Try to mix your personality with keywords related to your blog here. You don’t want it to sound like a robot, but you do want to be clear what your blog is about. If you aren’t sure, search for other bloggers in your niche and see what they use for their bio.
You also want to focus on what value you are providing on Pinterest and not just tell about yourself. This helps people understand what they get out of following you.
Make sure you claim your blog, but you can also claim your Instagram, YouTube, and Etsy shop. By claiming your website, you get stats on pins from your blog (even if you did not pin them).
Pinterest tends to push pins linked to your claimed domain/accounts more than other pins. Claiming your other channels also gives you access to stats about pins from those channels.
#2: NOT OPTIMIZING YOUR PINTEREST BOARDS
When I started my Pinterest, I made a board for each continent and a few generic boards (bucket list, best travel destinations, etc.). As I write more blog posts, I create more boards.
The goal is to be able to pin every blog post to highly relevant boards. Instead of focusing on general travel boards like “bucket list destinations” or “travel ideas”, focus in on specific destinations like “France Travel” or “Orlando Travel”.
When you pick your titles, don’t pick cutesy titles. Pick titles that use words people would actually search for instead. This gives you a better chance to show up in search results and helps Pinterest better understand your boards. It might be a fun title for you, but if it doesn’t help you get more clicks, it probably isn’t worth the cute title.
Once you have your boards, you can add a board cover. It really isn’t necessary, and if you don’t have time, that’s okay. I would actually recommend using an image you’ve pinned to that board.
Pinterest regularly changes how profiles look, and that can cause the size of board covers to change. Plus, anytime you make a new board, you have to make a new cover. If you have time or really want them for branding, go for it!
I created mine using Canva which is free (or you can do the paid option). You can see them here (they aren’t on all of my boards anymore – too busy working on client accounts!). The benefit your boards a more cohesive look and makes it clear which boards are yours and which ones are group boards.
Make sure give your boards a description. At first, I just listed keywords I thought people might search for on Pinterest related to that topic. After having an audit, I learned it is more important to make board descriptions easy to understand.
Write a few sentences that use keywords and location specific terms to help people understand what to expect from that board. You do not need to use all of the characters, but you do want to naturally work in keywords.
Get my FREE 5 day Pinterest audit series from my agency, Pinnovation Media, and get on my email list for Pinterest tips, what to pin each month and updates on new Pinterest features!
#3: NOT HAVING A “BEST OF” BOARD ON PINTEREST
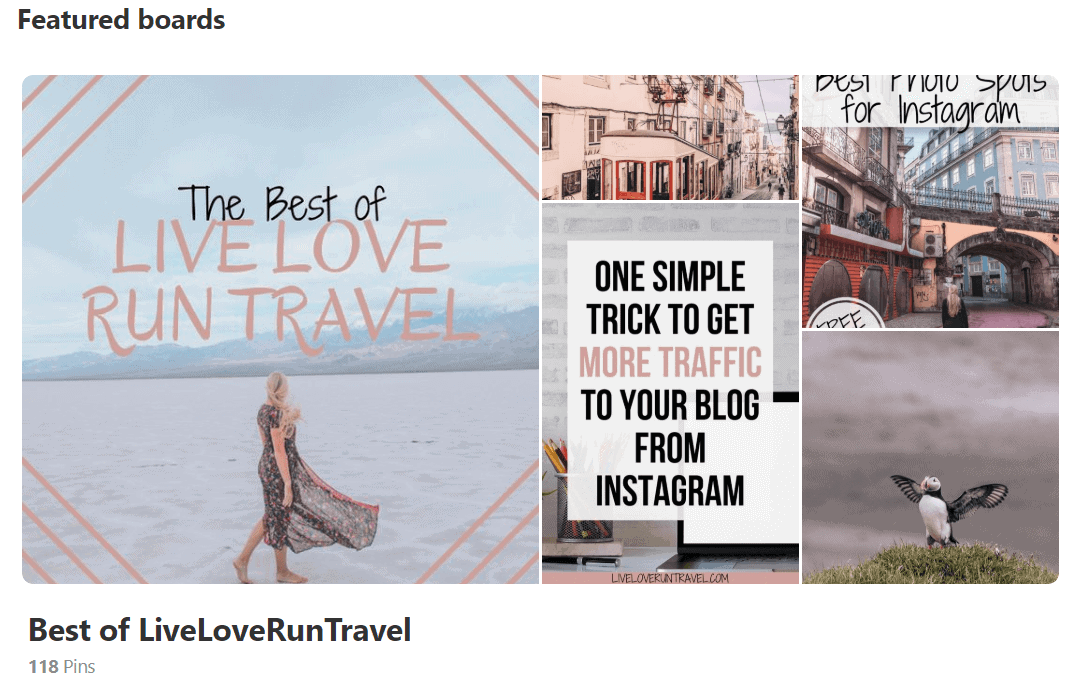
Having a “Best of” board allows you to show off your work. Most of your boards will mix your work with work from other bloggers. This means people have a hard time finding your pins. Keeping them all in a “Best of” board makes it easier for people to find your pins and see what you are about.
This is the board I keep at the top of my board list (if you look at other people’s accounts right now, you won’t see them in the right order – this seems to be one of the many Pinterest glitches). The goal is for it to be the first thing people see if they look at my Saved tab.
If someone comes to my page and wants to pin some of my pins or read some of my posts, they do not have to search through my recent pins or boards to figure out which ones are mine. They simply click on that board and pin any that interest them.
You can make multiple “Best of” type boards with just your pins in them. For example, have a general “Best of” board for all of your blog posts. If you have a few different categories with lots of posts, you could create a “Best of _______ – Europe” board for example.
If you pin a lot from other channels, you may want a board for them as well. We have Instagram boards for several clients as well as boards for products like presets, prints, and clothing lines that are branded boards. If you pin a lot of your TikTok videos or YouTube videos, make a board for those as well.
#4: GETTING PUT IN PINTEREST JAIL
If you already have a Pinterest account and are changing up your strategy, go slowly. Don’t go from 0 to 30 in a day. If you are just starting an account, you can start out pinning more and maintain it. If you already have an account though, suddenly changing all of your strategies with pinning can land you in Pinterest jail.
When I fixed my boards, I went through and added a bunch of pins to each board to fill them up (you don’t need to do this anymore!). I decided to fill them as soon as I started them. I also went through and deleted a bunch of old boards (I do not recommend doing this if the board has any of your old pins as sometimes your old pins take off).
After deleting a good number of boards and adding a bunch of pins to the new boards, Pinterest put me in Pinterest jail.
I woke up on Saturday morning and could not log into Pinterest. It told me my Pinterest account was suspended for spam activity. I found out through research that Pinterest does not really respond to emails on the weekend.
I emailed the general help email and the creator email for bloggers (no longer active). I got an email back on Monday morning that my account was back and that it had been a mistake.
After that, I built up more slowly. I made sure to pay attention to how many pins I saved at one time and did not pin a whole bunch at once. I also did not delete pins like that again, mainly deleting when I realized an error on my blog post in the pin description.
If you get put in Pinterest jail or if your Pinterest account gets suspended, here is what to do:
- Check your email for an email from Pinterest and click the link to appeal (sometimes they don’t send this email, but always check).
- Go to the Help Center and appeal your suspension. Here is the direct link to appeal your suspension.
- In your appeal, make sure to state what you were doing at the time it was suspended and ask for it to be reinstated as soon as possible.
- Keep an eye on your email. You should get a response within 24 – 48 hours that your account has been reinstated if you were not breaking their rules.
#5: NOT INCLUDING PINTEREST OPTIMIZED IMAGES ON ALL BLOG POSTS
When I’m reading a blog post and want to remember it later, I often want to pin it. If there is no text-overlay pin, I’m not as likely to pin it. I usually want the text to remember what the post is about when I’m scrolling through my boards later.
For every blog post on your blog, start by creating one or two pins for it. If you prefer creating in bulk, creating 10 or so. Find an image and put a text overlay with a title for the blog post.
Just having one of these on each blog post makes it much more likely to be shared. When you share these, they are much more likely to be clicked and to rank in search. However, that being said, pin the images too.
#6: NOT PINNING IMAGES FROM YOUR BLOG POST
When you post a blog post, chances are that you include images in that post. Pin those images! While images with a text overlay tend to get more clicks, plain images still get clicks and sometimes get more saves.
Plus, you don’t have to do any work to create them – they are already there. Some of my most saved and most clicked pins are just images. I have several image pins that bring in daily clicks to my site.
If you struggle to figure out what to pin, this can help fill your pinning calendar too. You don’t have to take time to sit down and create these, but they can help fill your boards and your pinning schedule without much additional work.
If you are like me and take tons of photos that never make it into your blog, you can also pull some of them to pin. You can upload them directly to Pinterest or upload them through a scheduling tool like Tailwind.
#7: PINNING THE SAME PINS OVER AND OVER AGAIN
Pinterest loves and prioritizes new content. While this does mean that Pinterest wants new URLs and brand new content to show users, you can still create new pins for old blog posts. It takes less time than writing a full post and can bring new life to old posts.
The first 8 – 12 months of using Pinterest, I created 2 – 3 pins per blog post, pinned them, and then kept pinning them. They might get clicks, they might not, but I kept pinning them over and over again anyways.
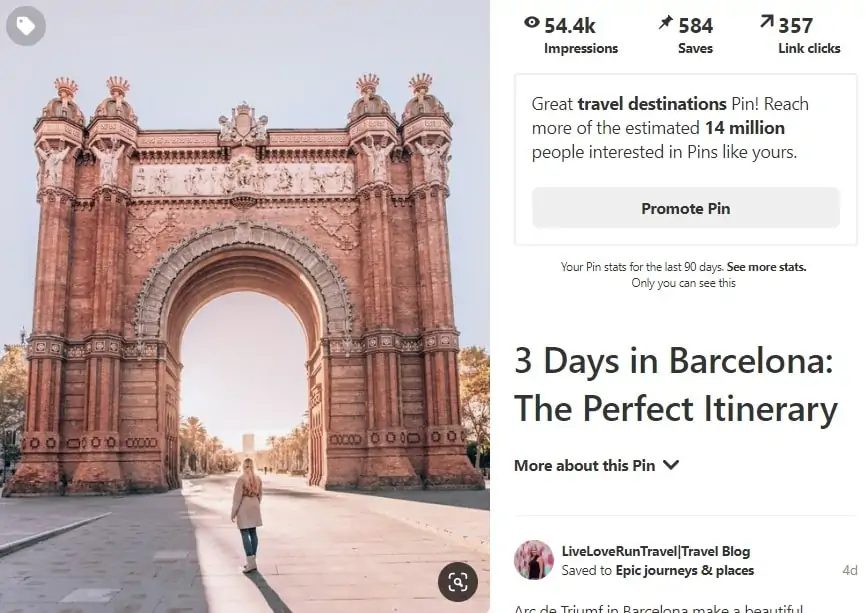
This is no longer within best practices. You want to have new pins and new content to share regularly. On our client accounts, I try to share a minimum of one brand new pin or image a day (some have enough content and publish enough content to do much more than this).
Once I put a pin through the relevant boards, I may never use it again. If I do, it would only be once or twice a year at most. You don’t want to keep putting that same pin back in the rotation all the time.
The easiest way to do this for me is to batch content. Instead of creating just 2 – 3 pins per post, I try to create at least 8 – 10 (usually more than that even).
I put them into folders by blog post and then moved them into my USED folder (organized by month/year) when I use them. This helps me keep track of when it is okay to cycle that pin through again if needed and helps me easily see how many pins I have left for each post.
It’s easier to me to make them all at once when I have the images and the post is fresh rather than making a couple now and then going back to make more in a couple of months.
Whatever you do though, don’t pin all those pins at once! Once they have been pinned, they are no longer fresh. Don’t put them all in your blog post either because then others might pin them months before you use them.
Just put one in the post. You can always switch it later if another one does well. The others can be uploaded to Pinterest or Tailwind.
#8: YOUR PINS ARE UGLY AND/OR HARD TO READ
My first pins were pretty rough. I quickly decided to change it and stick to my pink tones that commonly appear on my Instagram feed. Every pin had the exact same look for branding purposes.
The problem? They weren’t easy to read. The white text disappeared into the pink background on some screens. What did I do? Made the pink darker.
The only thing that ever changed on pins for a blog post was the image. I used the same design, the same text, and the same colors on every single pin. It made it faster because I just had to swap the image. When I wrote a new post, I wrote the new title and then started swapping images again.
In July, I started experimenting with my pins again. Now I have several designs I use for each post. Some have one image, and some have multiple images. Some have one font and some have multiple fonts.
I use one color on some and another color on others. I also made sure my text is clear and easy to read on all of my pins. Some have the same title as the blog post and many have other similar titles.
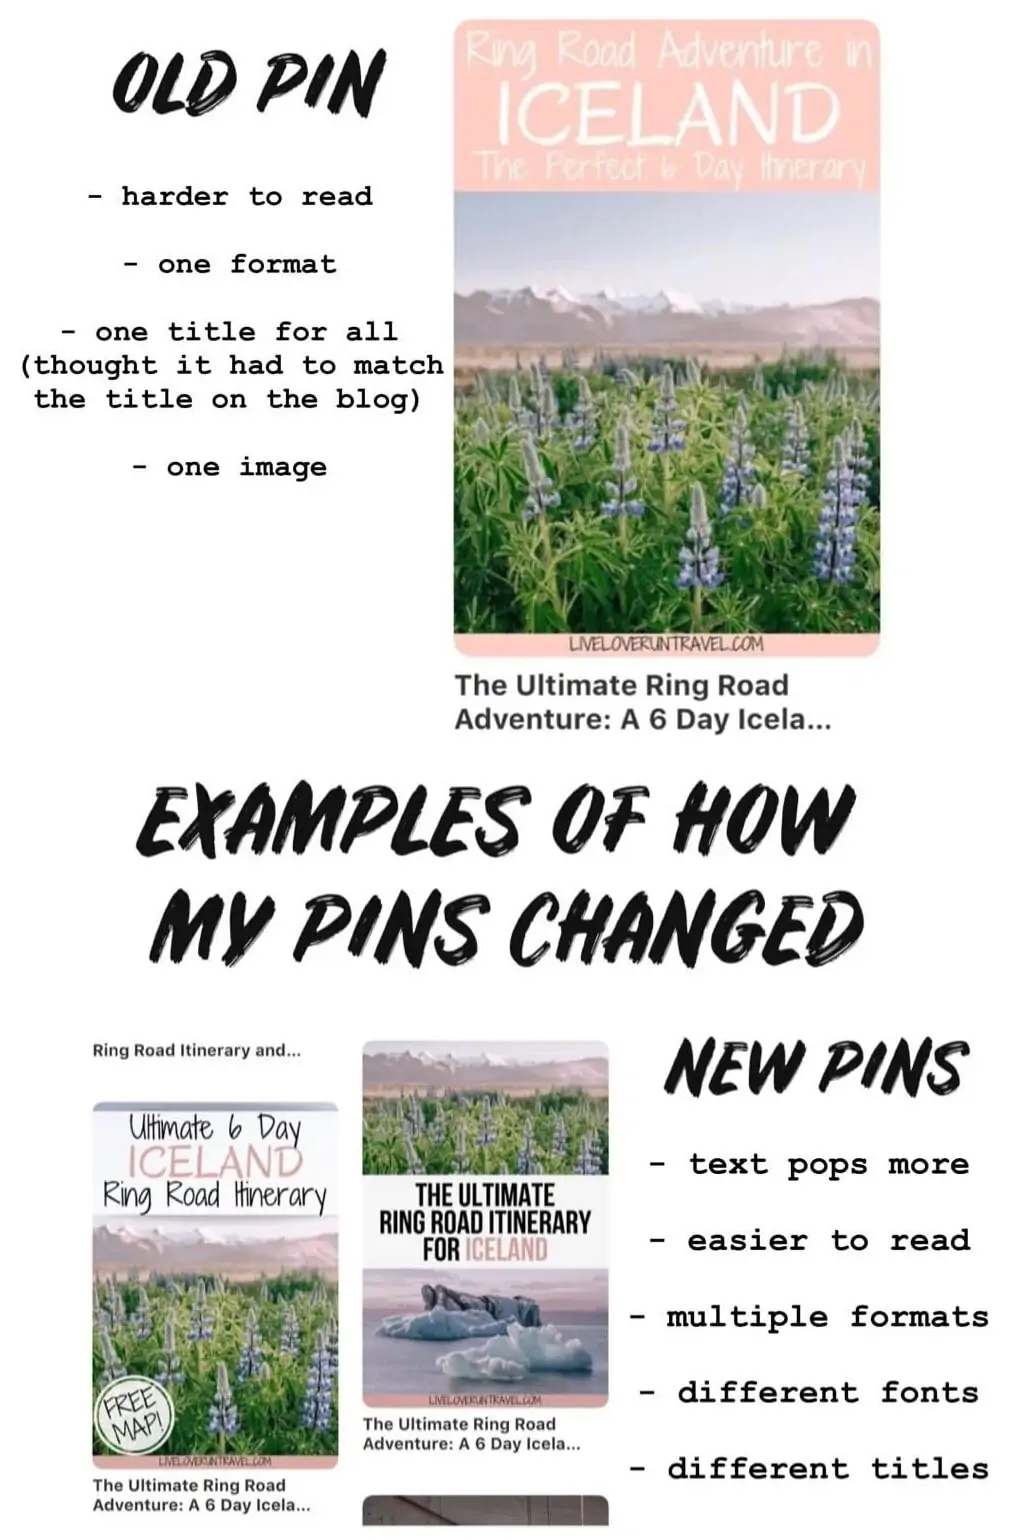
I also thought before that I needed to stick to my original blog title. Now I have a variety of wordings that go on my pins. Some attract one type of Pinterest user and others attract other types of users. Some may fall flat, but others take off right away.
I pay attention to which pins work and which ones do not work as well. This plays a large part in future titles for pins as I see what types of words tend to get the most clicks.
I also pay attention to which designs work best. Do the ones with a single image perform better or the ones with multiple images? Do the ones with me in them perform better or the ones without me in them? By tracking this, my future pins become more optimized.
If your pins aren’t getting many clicks, don’t be afraid to try something new. Canva is easy to use for creating pins for free. If you use Photoshop, you can also create pins there or in any other program that allows you to make graphics.
Take a look at the pins you compete with and give yourself an honest assessment. Are your pins as attractive as the ones at the top for your keyword? Are your pins easy to read when scrolling? Do they stand out from the pack?
If not, do what you can to fix them and make them more attractive. You can switch out images or edit your images to make your pins more attractive. You can also use stock photos if needed, but make sure you get the proper permissions so there are no copyright problems.
In general, you want to use fonts that are clear and easy to read. This helps Pinterest “read” your pin and understand it. You also want pinners to be able to read the text when scrolling on their phones. I always check on Canva on my phone to make sure it is big enough and easy enough to read.
#9: NOT PINNING TO THE MOST RELEVANT BOARD FIRST
In the past, common Pinterest strategy included pinning to your Best of board first and then pinning from there. That is no longer the case.
Instead, pin to the most relevant board first. For example, my Iceland road trip itinerary post goes to my Iceland board first. Then it goes to my Europe board, my road trips board, my travel itinerary board, and my summer travel board.
Once I am out of my most relevant boards, I pin it to my “Best of LiveLoveRunTravel” board. After I pin to to my “Best of” board, it can go to any relevant group boards.
By pinning it to your most relevant boards first, you signal to Pinterest what your pin and your blog post are about. If I pinned the same post to bucket list destinations or a group board first, Pinterest can only tell it is travel related.
By pinning to my Iceland board first, Pinterest knows it is specifically about Iceland travel. The other boards tell Pinterest that it includes a road trip, an itinerary, and relates to summer travel and travel in Europe. From these words, Pinterest can get a good idea of what my pin and my post is about.
Make sure you are pinning with an interval though. You don’t want to pin the same URL too often or too many times in a row!
#10: NOT USING PIN DESCRIPTIONS ON IMAGES ON YOUR BLOG
Every image on your blog needs alt text, but alt text is not where your pin description should go. Alt text allows people who use screen readers to know what the image is about. It is also what Pinterest pulls for your pin description if you don’t provide it another way.
There are a few options for ways to add a pin description to an image. If you are comfortable with coding it in, you can add data-pin-description=”Pin description here” to the code for the image. This is what I used to do and still do on some client accounts.
Now I use a plugin called Social Pug (now Grow by Mediavine). It is a paid plugin but is worth it to me. It lets you control what image readers can pin using your share buttons and also includes a spot for a pin description. WP Tasty Pins is another option.
The biggest difference between Grow and Tasty Pins is that Grow does all of your social media shares. Tasty Pins focuses on Pinterest.
For my pin descriptions on regular images, I start by describing the image and try to add keywords when possible. For example, for a picture of me watching the hot air balloons in Cappadocia, I might put something like “Sitting on the balcony at Cappadocia Cave Suites watching the hot air balloons at sunrise in Cappadocia.” This adds some searchable keywords while still describing the image.
Then I add a sentence for Pinterest that says something like this: “Click here for a 3 day Cappadocia itinerary including all of the most Instagrammable places in Cappadocia, Turkey.” This sentence also helps get more keywords in the description.
For pin descriptions on my text-overlay pins, I use a sentence or two to describe the post with several keywords related to the post and a call to action to click through.
While keyword stuffing is still somewhat common on Pinterest, it is best practice to put your keywords in your description naturally within sentences instead of putting them in fenceposts (|keyword|). If there are longer keywords that won’t naturally fit but are highly relevant to your post, you could put them in the end.
While hashtags used to be a thing on Pinterest, they were eventually converted to just keywords. For example, #paristravel would be the same as Paris travel.
Now several emails from Pinterest have said that hashtags are considered spammy, so I am in the process of removing them from old descriptions and no longer using them in new descriptions. If you do use them, make sure to use them sparingly and use keyword rich hashtags.
#11: NOT USING TAILWIND FOR PINTEREST
Tailwind is an amazing way to pin regularly on Pinterest without having to be on Pinterest all the time. It is one of the best blogging tools to grow your blog.
If you want to give it a try, click here to get $15 off (basically one month free). It also has an Instagram scheduling tool and hashtag research tool for Instagram.
When I first started on Pinterest, Tailwind was the only thing I used. I still use it, but I also pin manually (see the next Pinterest mistake for more). I schedule to Tailwind to keep pinning at regular intervals though.
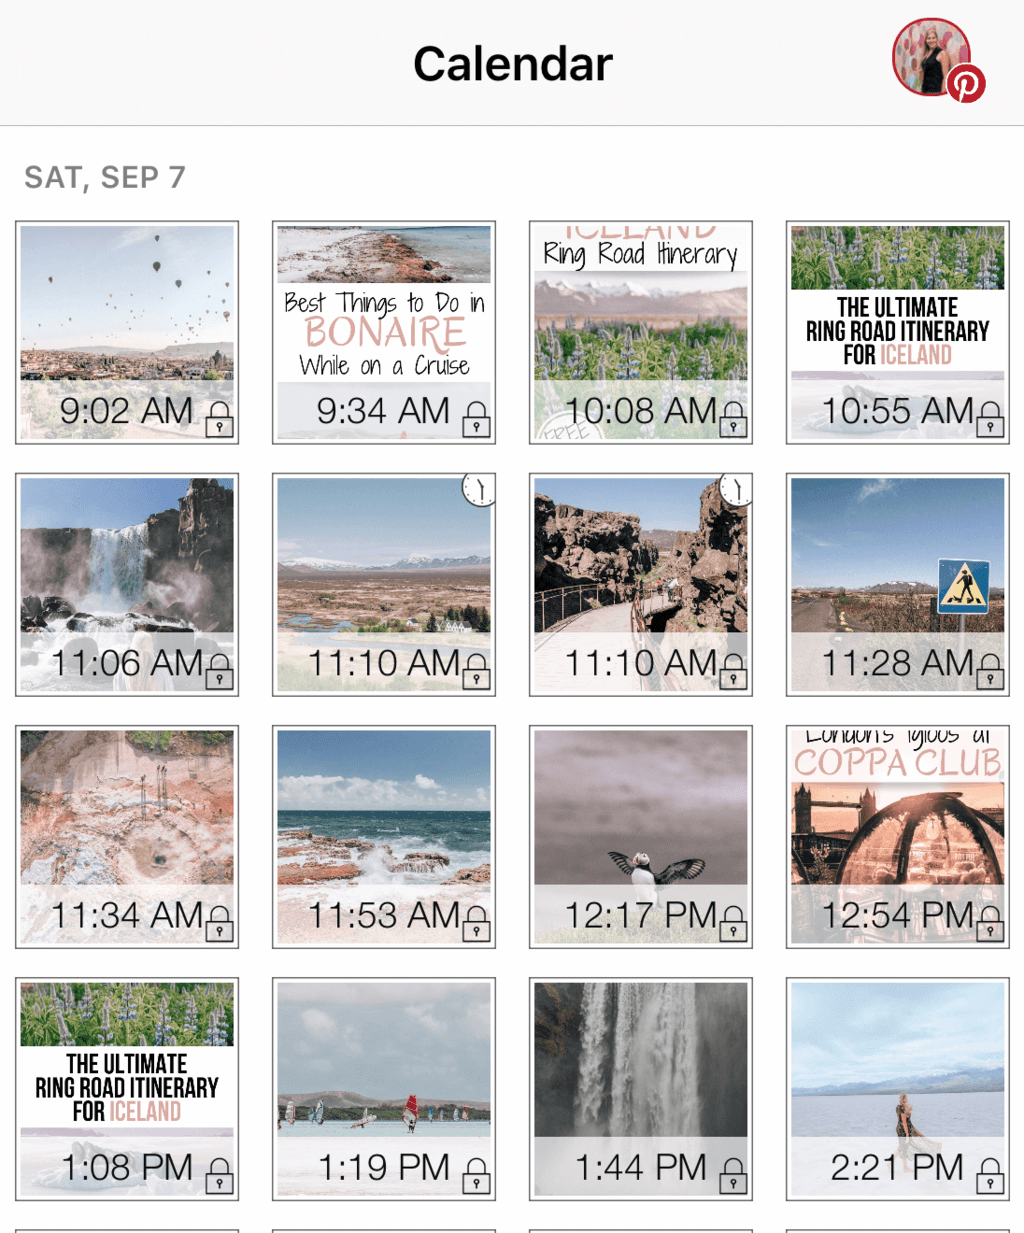
We have clients with anywhere from 3 – 40 pins a day through Tailwind. You can change the amount of pins and schedule your pins and images ahead of time to set it and forget it. Using the chrome extension makes it easy to add or even schedule all of your images at once.
For my Pinterest optimized images, I pin to my most relevant board right away manually. It would be hard to keep track of which boards everything went to without Tailwind though.
Once I pin it manually, I schedule out the rest of the boards through Tailwind. Tailwind has an option to pin in intervals, and best practice is at least a 2 day interval between the same pin going to a second board. Using Tailwind saves me a ton of time on Pinterest.
#12: ONLY USING TAILWIND FOR PINTEREST & NOT TRYING MANUAL PINNING
As mentioned before, when I first started, I only pinned through Tailwind. This isn’t a bad way to do it, and many people get great results this way.
Some of our clients get much better results from pinning through Tailwind than manually, so we focus only on Tailwind for those accounts. Other accounts do well with a mix of both and still others get drastically better results from manual pinning.
It is a good idea to test this on your account every few months, but always give it time before you make a decision. If you look the next day, chances are the manually pinned image will have much higher stats. If you look at week or two later though, often the Tailwind pin has caught up or even moved ahead.
Both Pinterest and Tailwind have said there is no difference in manual or Tailwind pinning. What I tend to do is pin at least the text overlay pins to the first board manually and then schedule the rest. This seems to work well for the majority of our clients.
#13: NOT USING GROUP BOARDS ON PINTEREST
Some people say group boards are dead. While they may not be as successful as they once were, I do tend to still get saves and clicks from them.
This is another thing to check for your account though. You don’t want to schedule to tons of group boards like in the past, but if you find some are working, it is worth it to keep using.
When looking at group boards, I look at a few things. I used to join them all, but I rarely join new boards now. I do look at the number of followers and contributors before I join. I also look at the quality of pins on the board.
You want to join group boards that are specific to your niche. Do not join generic group boards as they allow all pins to be shared. This means the people following the board are less likely to be your target audience.
If you join group boards, you do want to keep an eye on them. Use Pinterest analytics and look at the top 30 boards in your analytics. Sort by the last 90 days and by link clicks (now outbound clicks) and see if those group boards are actually getting clicks.
If they are getting a good number, it is probably a good idea to keep pinning to them. If they are not, it is probably now. Archive the group boards that are not performing for you.
HOW TO JOIN GROUP BOARDS ON PINTEREST
To join group boards on Pinterest, read the board description. Sometimes there is a button to request to join the board. Sometimes you have to go to a certain website to sign up.
The most common way is to reach out to the board owner. You can find the board owner in the URL right after Pinterest.com (see below). If you simply delete the board name off the end of the URL, it takes you do the owners page. You can send them a message through Pinterest or an email through their blog.
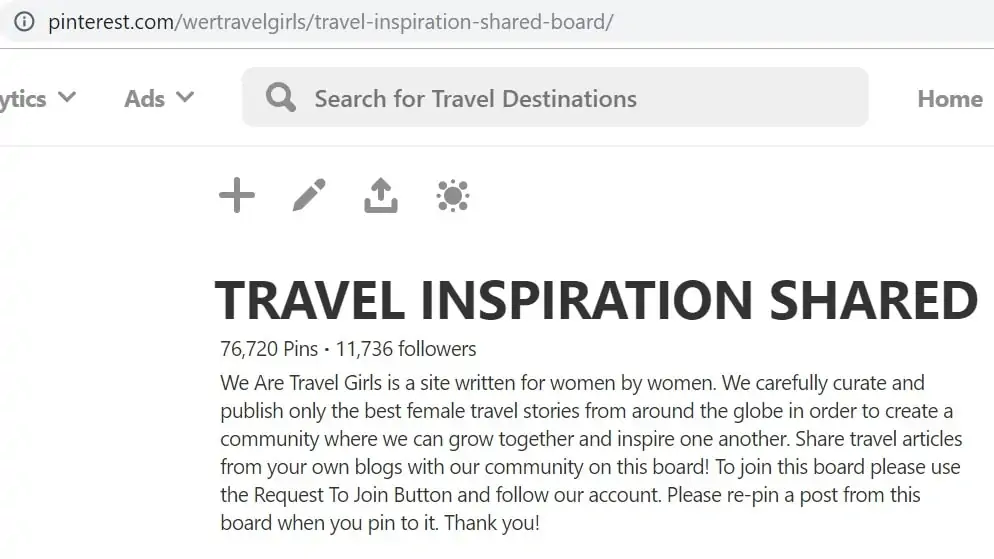
Here are some of the best group boards for travel blogs or female travel blogs:
Boutique Travel Tips, Trips and Hotels
We Are Travel Girls Travel Inspiration Shared Board
Girls Gone Global
#14: NOT USING TAILWIND COMMUNITIES
If you use or decide to try Tailwind, make sure to use Tailwind Communties. In Tailwind Communities, you share your pins (usually text overlay pins only, not just images) and others can reciprocate and schedule your pins to fill up their pinning schedule.
Some Communities require a certain ratio of shares. The Community owners can easily check your ratio and kick out anyone who is not sharing enough pins. Group boards are harder to police making Tailwind Communities more effective oftentimes.
With Communities, the quality of your content matters. As people scroll through to look for pins they want to use, they are more likely to look for high quality pins with a title and descriptions.
While in the past you might want to pin a lot of content from communities, now you want to focus on high quality content that compliments your content. I pin the minimum required, but I don’t go crazy in Communities anymore.
When you schedule your own pins to Communities, I would not share the same pin to all Communities. Instead, as you schedule the pins you’ve made over time, add them to different Communities to get more shares since Tailwind tells users if they have scheduled or pinned the content before.

BEST TAILWIND TRIBES FOR TRAVEL BLOGGERS
In Tailwind, you can search for these Communities by name. You are limited on the number of Communities you can join, but you can pay to upgrade to join more if you would like. If you do upgrade, the 10/80 plan can make sense, but it is rare you would need the unlimited/200 plan.
You can also pay attention to which ones work best for you and leave the ones that aren’t working so well. Give it at least a month or two before leaving to see which ones work best.
Dream.Pin.Go [Mappin Monday]
_Travel_
Ultimate Travel Inspiration and Tips
#15: NOT TRYING VIDEO OR STORY PINS
Video pins and story pins are the newer formats of pins on Pinterest, and Pinterest is pushing them in a major way. If you haven’t tried one or both formats, put that on your to do list.
For videos, you have a few options. You can create animated pins in Canva with the click of a button or you can use videos clips you took for YouTube, Instagram, or TikTok.
If you are creating Reels and TikToks, pin them! Link them back to a related blog post or link them to your social channel. You can even use them for story pins.
With story pins, there is no linking to your site. This makes them not as useful, but they can help you grow your following and your engagement overall. The more people engage with your pins, the more likely Pinterest will show them your pins in the future.
If you are struggling with story pins, here are step by step directions and here are best practices. Pinterest gives some examples too, so here are story pins in a variety of niches chosen by Pinterest.
If you don’t have story pins yet, what you need to do is based on where your account is set. If you are in the US, you should have an invite on your account. To find it, you can go to “Create” and then choose Create Story Pins.
If your account is outside of the US, you can use this link to apply for story pins. It can take a couple of weeks, but they will email you when you have access.
With video and story pins, you can add tags. While the tags are fairly generic, try to find a few that are pretty closely related to your pin.
HOW TO KNOW WHAT IS WORKING ON PINTEREST
Now that you have fixed (or plan to fix) your Pinterest mistakes, how can you know if it is working? If you get a viral pin on Pinterest, you will know it worked. However, even if a pin doesn’t go viral, you can still see success in other ways through analytics.
Look at Pinterest analytics for one. Your Pinterest analytics board allows you to change the time period. Look at larger ranges of dates like the last 30, 60, or even 90 days. Look at impressions, but focus on Outbound Clicks.
Make sure to change it on the left side of the screen to only show your site’s pins too (Pinterest recently changed analytics to show this automatically, but some accounts still mix in other pins). While looking at all of the pins is good, you care about getting more traffic to your blog specifically.
Also scroll down to the bottom of the page. Here you see your top pins during that time period. You can look at impressions, saves, outbound clicks, etc. again here.
Pay attention to if any of your new pins are rising stars on this list. Sometimes they may not take off right away. Give it time to grow and make the list.
Another place to look is on Google Analytics. If you haven’t already done it, install Google Analytics on your website now. It is free and gives you more data than you will probably ever need on your website.
In Google Analytics, go to Acquisition, then Social, and then click on Pinterest. This lets you see which pages on your site get the most clicks from Pinterest. Again, you can adjust your time period to get a wider view.
To take it one step further, click on any of the pages there. This brings up all of your pins that have brought in traffic in that time period. You can use those links to see which pins are working best (you have to copy and paste them).
While Pinterest analytics gives you more details on specific pins, Google Analytics is great for seeing which posts are getting the most traffic. It’s nice to know the top performing pins, but sometimes there are a lot of smaller pins combining to make a completely different post your top post.

Pinnovation Media, my Pinterest marketing agency, sends out updates once or twice a month on what to pin, updates to new Pinterest features, etc. You can sign up here to get on the list!
MAKE TODAY THE DAY YOU GO VIRAL ON PINTEREST
If Pinterest isn’t bringing you traffic or you are like I was and resisting Pinterest, start using Pinterest and making changes today. It is worth the effort!
Once you are set up, it does not take much time each day to pin or set up your schedule in Tailwind. If you feel stuck, try making some of these changes one at a time and get your traffic moving in the right direction again.
Happy pinning!
Looking for a more individual approach or for someone else to help with your Pinterest account? Head to my agency, Pinnovation Media, to see how we can help. We currently manage 30+ accounts in a variety of niches. We also share free tips on our Instagram page here and on Clubhouse (find me at @pinnovation).
If you want to connect on Pinterest, you can find me here. For more blogging tips to bring traffic to your site, check out the 8 things I did to explode my traffic by 1000% in just 6 months, the 9 tools every blogger needs, and the 24 things I wish I knew earlier about blogging.
Like this post? Pin it to save it for later and share with others!


Mary
Tuesday 15th of August 2023
Can you put a video pin in your blog post or will it destroy your site speed?
Christine Wheeler
Thursday 17th of August 2023
I would not put a video pin in a blog post because it will slow down site speed. If you just did it once, it would probably be okay depending on the size of the video. You might be better off embedding it or just putting the static pin and a link to the video pin to see it/repin it.
sue pats
Tuesday 18th of January 2022
Wealth of info, appreciate it. Great job.
Christine Wheeler
Tuesday 18th of January 2022
Thank you!
Heather
Wednesday 9th of June 2021
How long does it take for Tailwind Communities to reciprocate re-sharing of pins? My pins are well done, I think. Some have text overlays and others are just an image. I’m really stumped on why nothing is working. I have the titles and descriptions down. So not sure what the problem is. Thoughts?
Christine Wheeler
Monday 14th of June 2021
For communities, you usually need text overlay pins. You can see when people schedule them, but it may take a few days or even a few months before it goes out (depends on how far in advance they schedule). I find it helpful to reciprocate when someone shares one of mine if they have high quality pins that are on brand for my boards.
Rachel
Thursday 22nd of April 2021
So rather than adding another plugin to my site, I was going to try the coding you mentioned for adding a pin description. I have a WordPress blog, so where would I put that? I have options for alt text, title, captions, and description to choose from. I'm assuming then in the description or is it in another location entirely? Thank you for your help! If it's too complicated, I'll probably just use the plugin, but still wanted to at least try.
Christine Wheeler
Monday 26th of April 2021
Hi Rachel - feel free to DM me on Instagram if this doesn't make sense, but it depends on if you have Gutenburg or Classic editor. For classic editor, you have to switch over to the HTML view and search for "IMG" to find the images in the post. Then add it after it says alt="" (your alt text will be between the quotes). If you use Gutenburg, you have to change the image block to HTML and add it there. It sometimes breaks the image in the draft version post, but the image displays fine went the post is live.
Laureb
Tuesday 6th of April 2021
Great tips! Being a mom with a full time job, how much should I realistically be spending on Pinterest a week?
Christine Wheeler
Monday 26th of April 2021
Hi Lauren - depending on how much content you have and how much you are pinning, I would say probably 1 - 3 hours total. I would try batching if you haven't already. Set aside an hour one day and make a bunch of pins for your existing content. Then for each new post, make 5 - 10 pins for it when you write the post. That makes it so you can focus on just pinning. If you use Tailwind, you can schedule out your entire queue from the time you publish one post until you think you might post the next one and then not touch it again until you post your next post.